|
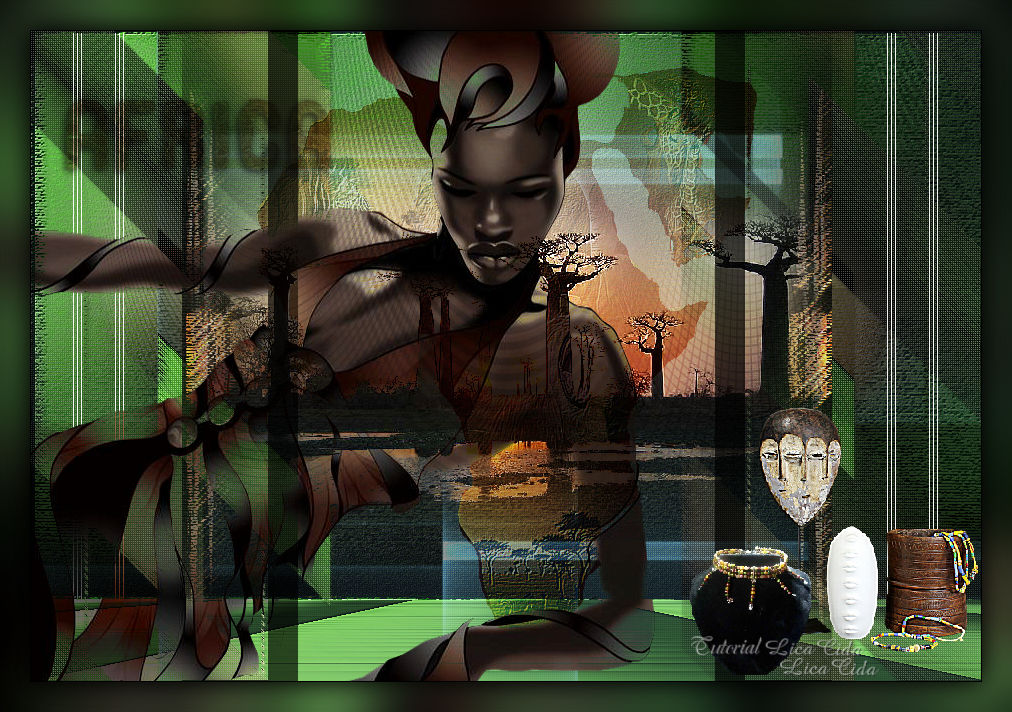
Africa
TRADUÇÕES

MATERIAL

Tubes: calguisvect12119
calguismisttree10082012
calguismontageafrique1119
calguisafrica25109
calguisdeco03062012
calguisdecorperle8910
Mask: Narah_Mask_1123
Decos: Ildiko_create_deco (63)
Ildiko_Desings_Created@Deco_&_ildiko_kjk 1-10 (7)
Ildiko_create_deco (55)
Marca-d'água.
Efeitos do PSP.
Versão usada: PSP X8.
PLUGINS
Plugin Kiwi's → Videowand
Plugin Artistiques → Pastels
Plugin penta.com → color dot
Plugin Simple → Half Wrap
Plugin Galaxy
Plugin MuRa's Meister → Perspective Tiling
Plugin FM Tile Tools → Blend Emboss
TUTORIAL
|
Esta seta marca sua linha
Clique e arraste para movê-la
|
|
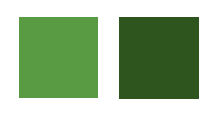
Configure: Foreground: #599b43 — Background: #2d551d.
1_.
Abra uma nova imagem transparente de 950 x 650 px.
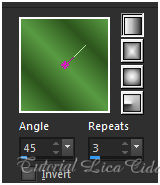
Pinte com o gradiente formado pelas cores acima.
Configure: Style: Linear — Angle: 45 — Repeats: 3 — Invert desmarcado.
Selections → Select All.
Edit → Copy no tube calguismisttree10082012
Edit → Paste Into Selection.
Selections → Select None.
Adjust → Blur → Gaussian Blur — Radius: 28,00.
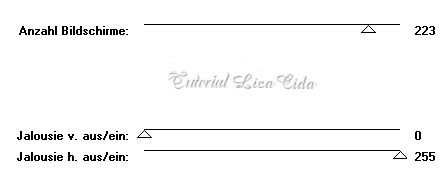
Plugin Kiwi's → Videowand.
2_.
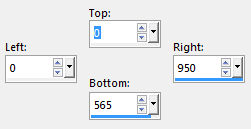
Ative a ferramenta Selection Tool (tecla S) → Custom Selection 1.
Selections → Promote Selection to Layer.
Selections → Select None.
3_.
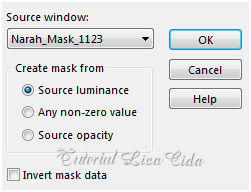
Layers → New Mask Layer → From Image: Narah_Mask_1123.
Layers → Merge → Merge Group.
Effects → 3D Effects → Drop Shadow: 1 / 1 / 76 / 6,00 — Color: #000000.
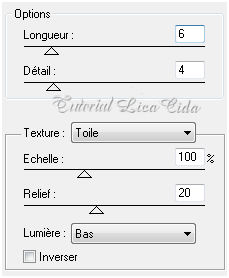
Plugin Artistiques → Pastels.
4_.
Layers → Duplicate.
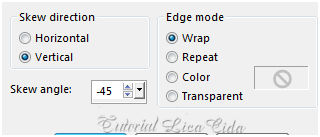
Effects → Geometric Effects → Skew.
Plugin penta.com → color dot — Default.
5_.
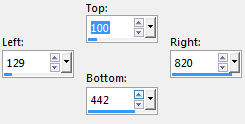
Ative a ferramenta Selection Tool (tecla S) → Custom Selection 2.
Layers → New Raster Layer.
Edit → Copy no tube calguismisttree10082012 (deverá estar na memória).
Edit → Paste Into Selection.
Adjust → Sharpness → Sharpen More.
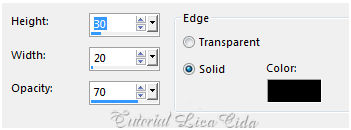
Effects → 3D Effects → Buttonize.
Selections → Select None.
Plugin Simple → Half Wrap.
Effects → Reflection Effects → Rotating Mirror: H: 0 / R: 180 — Repeat.
Plugin Galaxy.
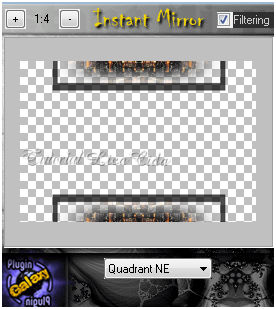
Image → Free Rotate.
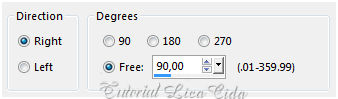
Plugin Artistiques → Pastels (valores iguais aos do print do item 3). Aplique duas vezes.
6_.
Edit → Copy no tube calguismisttree10082012 (deverá estar na memória).
Edit → Paste As New Layer.
Image → Resize: 80% — Resize all layers desmarcado (duas vezes).
Adjust → Sharpness → Sharpen More.
Layers → Arrange → Move Down.
7_.
Edit → Copy no tube calguismontageafrique1119
Edit → Paste As New Layer.
Adjust → Sharpness → Sharpen More.
Blend Mode: Soft Light.
8_.
Edit → Copy no Ildiko_create_deco (63)
Edit → Paste As New Layer.
Effects → Image Effects → Offset: H: 0 / V: 73 — Custom e Transparent marcados.
Com a ferramenta Pick Tool, traga o deco para 570 px.
Adjust → Sharpness → Sharpen More.
Layers → Arrange → Move Up.
9_.
Ative a Raster 1.
Ative a ferramenta Selection Tool (tecla S) → Custom Selection 3.
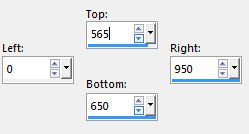
Selections → Promote Selection to Layer.
Selections → Select None.
Plugin MuRa's Meister → Perspective Tiling — Default.
Desça o efeito para 570 px.
Adjust → Sharpness → Sharpen More.
10_.
Ative novamente a Raster 1.
Plugin Artistiques → Pastels (valores iguais aos do print do item 3).
Adjust → Add/Remove Noise → JPEG Artifact Removal — Maximum — C: 79.
Plugin FM Tile Tools → Blend Emboss.
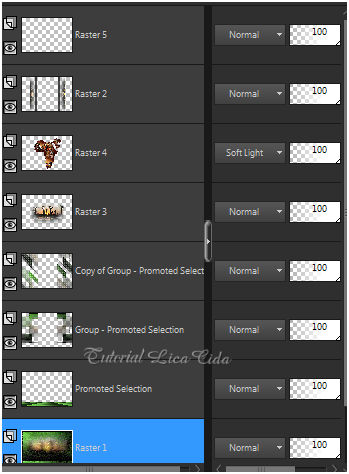
Altere os Blend Modes e a Opacity das layers.
11_.
Ative a layer Promoted Selection (a do Plugin MuRa's Meister → Perspective Tiling).
Layers → New Raster Layer.
Selections → Select All.
Edit → Copy no Ildiko_Desings_Created@Deco_&_ildiko_kjk 1-10 (7)
Edit → Paste Into Selection.
Selections → Select None.
Plugin penta.com → color dot — Default.
Blend Mode: Screen — Opacity: 57%.
12_.
Ative a layer superior (Raster 5).
Edit → Copy no tube calguisvect12119
Edit → Paste As New Layer.
Image → Mirror.
Objects → Align → Left (acerte na parte superior e inferior).
Adjust → Sharpness → Sharpen.
Blend Mode: Darken (use o Blend Mode a gosto).
13_.
Edit → Copy no tube calguisafrica25109
Edit → Paste As New Layer.
Use a gosto.
14_.
Layers → New Raster Layer.
Selections → Select All.
Edit → Copy no Ildiko_create_deco (55)
Edit → Paste Into Selection.
Selections → Select None.
Blend Mode: Overlay.
Adjust → Sharpness → Sharpen More.
15_.
Edit → Copy nos tubes calguisdeco03062012 e calguisdecorperle8910
Edit → Paste As New Layer.
Decore a gosto.
Image → Add Borders: 1 px, Symmetric marcado — Color: #000000.
Aplique a marca-d'água.
Assine e salve.
Espero que gostem.
Aparecida / LicaCida, julho de 2017.
Rio de Janeiro - Brasil.


VOLTAR
Copyright ©2026 - Web Design - Naise Minas
|


